
Integrate and Optimize Your Unity Mini Game
Call TikTok platform features from your Unity C# scripts, reduce build size and startup time, and split Wasm code. This guide continues from Build Mini Games With Unity, which covers importing the plugin, building, and previewing on a phone.
Prerequisites
- Your Unity game runs in TikTok on your phone with Client preview, as described in Build Mini Games With Unity.
- Your project uses TikTok SDK for Unity plugin 1.1.6 Release, and
TT.InitSDKsucceeds at startup.
Integrate platform features
After the SDK initializes, call the APIs your game needs from your C# scripts. For configuration and complete integration flows, see each feature's guide. To check method signatures and parameters, go to the method's definition in the TTSDK assembly in your project.
JavaScript examples in the feature guides don't work in C# scripts. Use the C# APIs in the following table.
Feature | C# API | Guide |
Silent login |
| |
User profile authorization |
| |
Rewarded video ads |
| |
In-app purchases |
| |
Home screen shortcut |
| |
Revisit from profile |
| |
Direct message sharing |
|
Login: Games with in-app purchases must integrate silent login. A game that only uses in-app ads and doesn't need account-bound saves or payments doesn't need login. If your game server needs to identify a TikTok user, follow the Silent Login guide.
Add login
The following example calls TT.Login after initialization succeeds.
- If you added
TikTokSdkInit.csin Initialize the SDK, replace its contents with this example. Keep the component on an active object in your startup scene. - If your project already initializes the SDK, including the 2048 sample, add only the
TT.Logincall to your existing success path. Don't callTT.InitSDKa second time.
using TTSDK;
using UnityEngine;

public class TikTokSdkInit : MonoBehaviour
{
  private void Start()
  {
    TT.InitSDK((initCode, env) =>
    {
      if (initCode != 0)
      {
        Debug.LogError("SDK initialization failed: " + initCode);
        return;
      }

      Debug.Log("SDK initialized successfully");
      TT.Login(
        loginCode =>
        {
          Debug.Log("TikTok login callback received");
          // Send loginCode to your game server to authenticate the user
        },
        error => Debug.LogError("TikTok login failed: " + error)
      );
    });
  }
}
loginCode is a temporary login credential, not a user ID. Send it to your game server and follow the Silent Login guide to authenticate the user and start a session. This example doesn't include a server implementation. The Editor's mock result doesn't replace login testing on a phone.
Reduce build size and startup time
First, find where players wait: during download, engine initialization, or entry into the first scene. Then check whether the entry scene depends on later levels or nonessential resources. After each change, test the same gameplay on the same device.
For general guidance, see the Performance Optimization guide. For an overview of mini game startup and asset loading, see the Mini Games Technical Overview.
Find what makes the build large
Keep a working build as a baseline. Record the Unity and SDK plugin versions, the build target, the Development Build setting, and your resource configuration, and use the same settings for later comparisons.

- In Unity, open Window > General > Console. From the Console menu, select Open Editor Log.
- Find the Build Report for the latest build. Use the asset breakdown to find large textures, audio, scenes, and other resources.
- In the exported package, check for large
.data,.wasm, and other files.
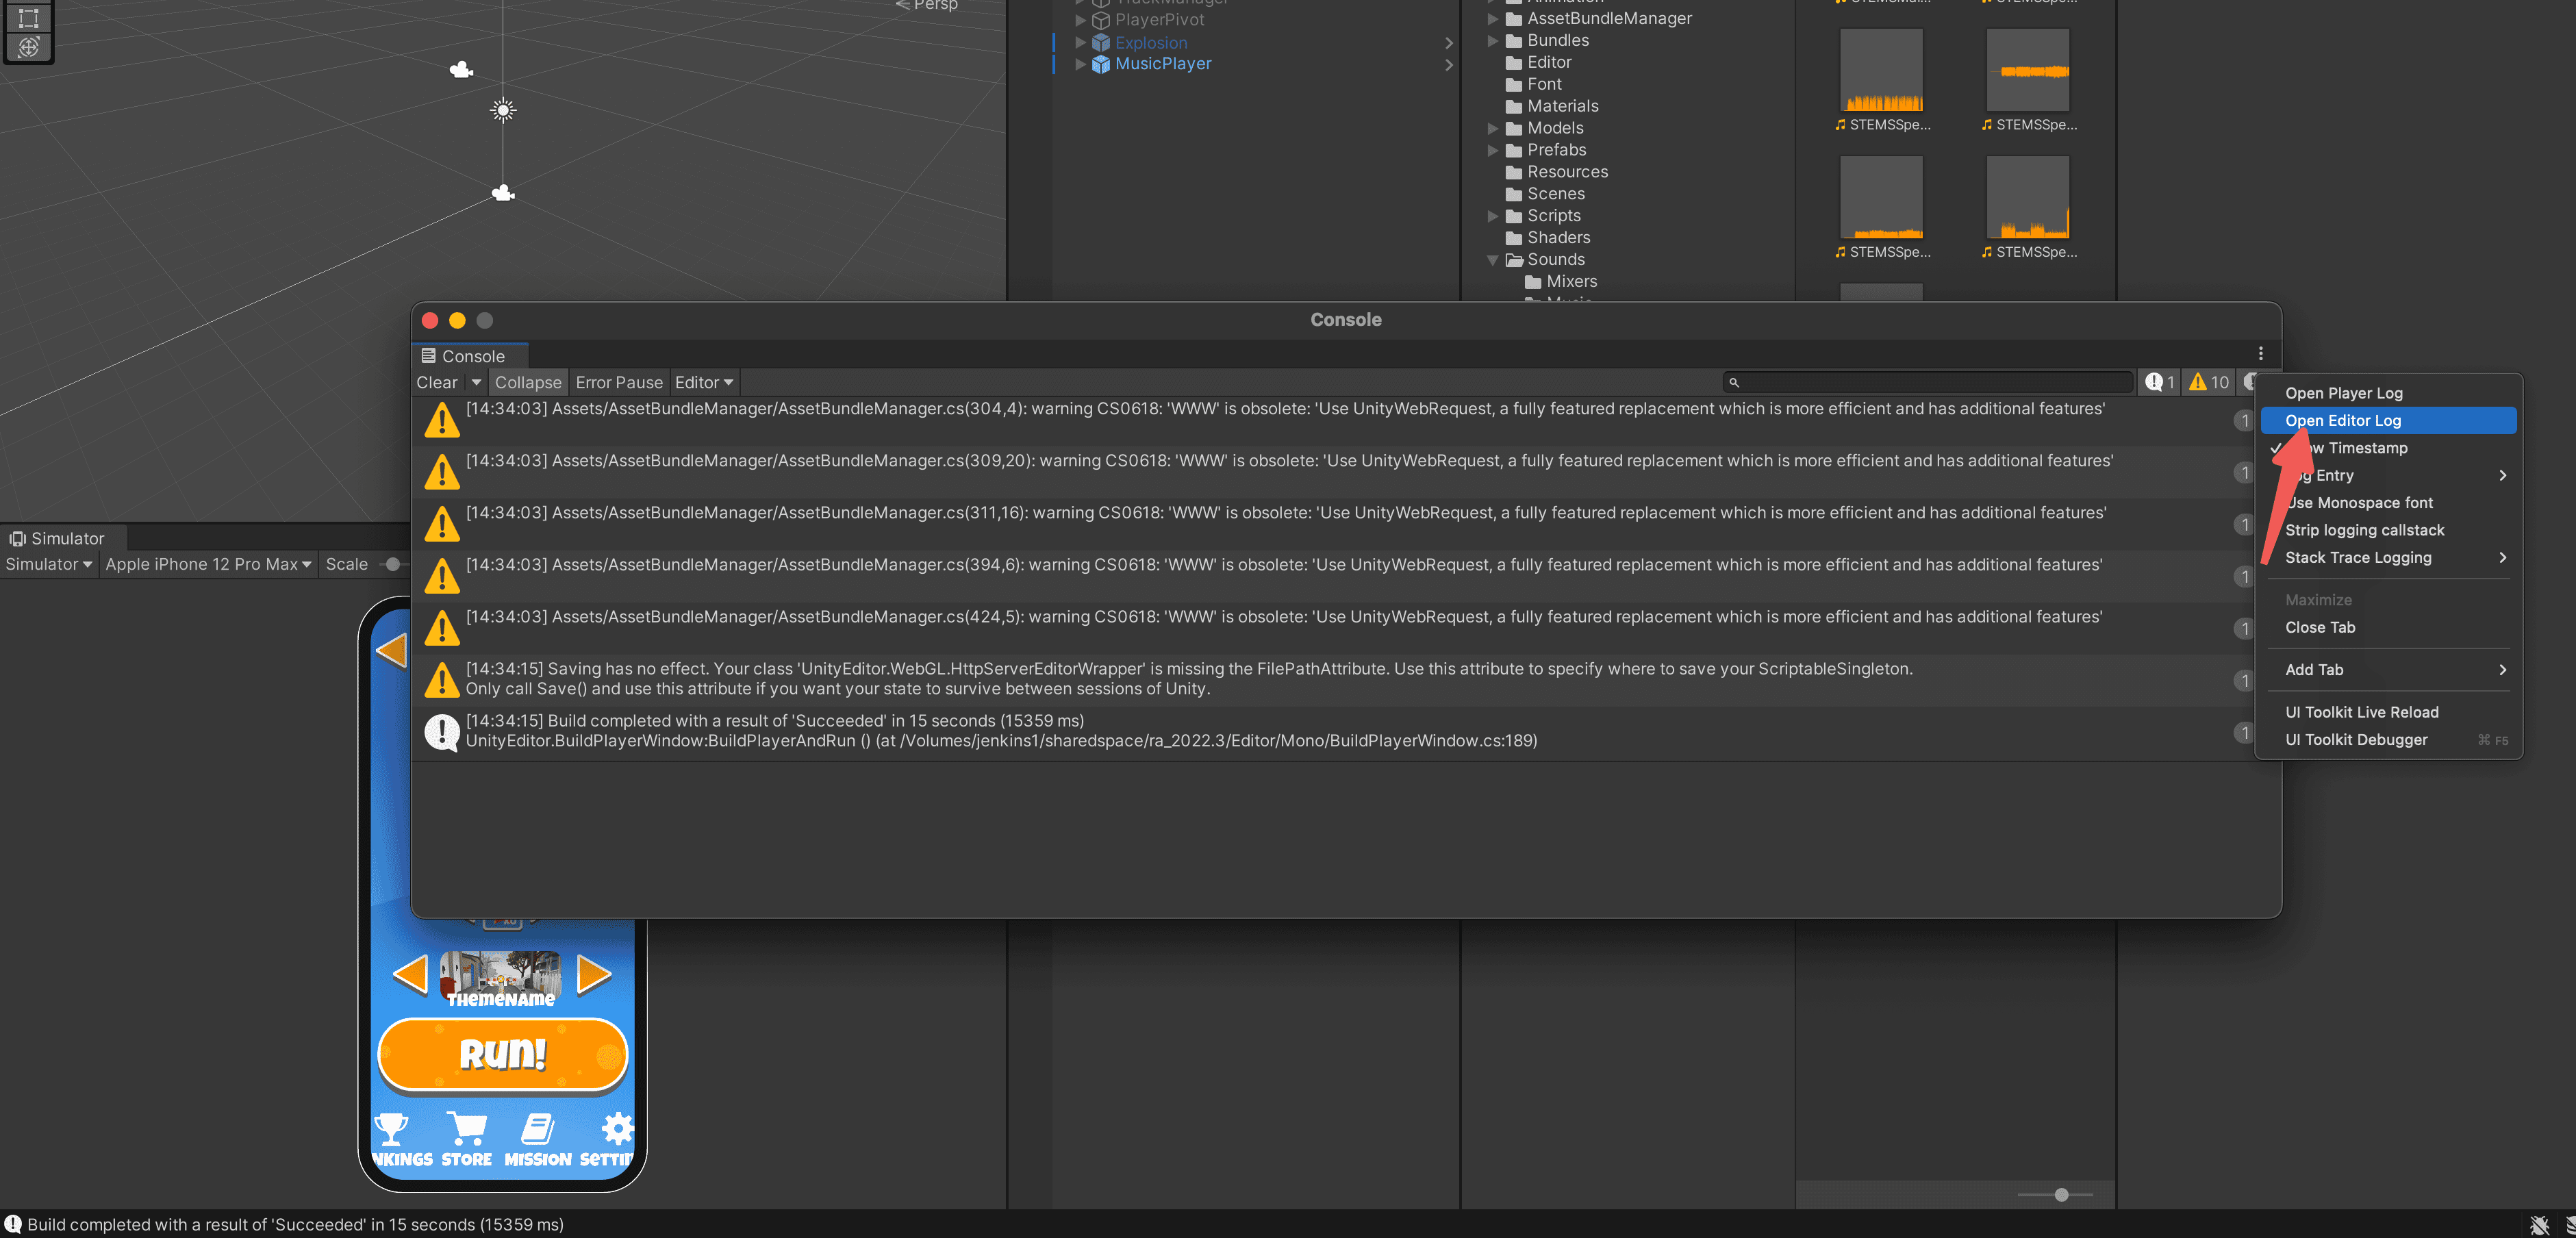
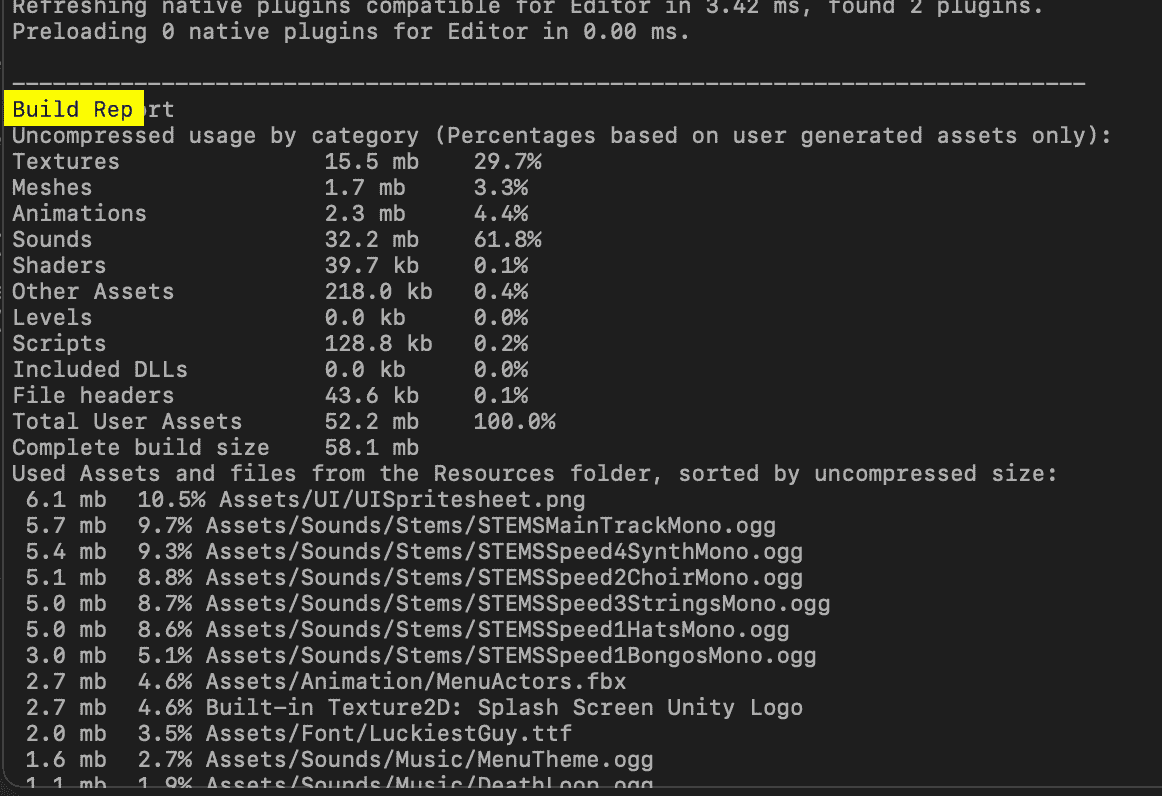
Unity's asset report, the compressed download size, and the platform package check measure different things. Record each result separately. A smaller package doesn't by itself mean faster startup or lower runtime memory.
Reduce texture and audio size
To reduce texture size:
- In the Project panel, select a large texture.
- In the Inspector panel, check Max Size and the compression settings for your build target.
- Change one oversized texture, apply the setting, and rebuild.
- Compare package size and visual quality on your target phones.
Keep alpha channels where transparent UI needs them.
ASTC is one compression format to evaluate. First confirm that your Unity version, SDK plugin, and target devices support it. Then compare image quality, package size, and runtime memory. ASTC isn't supported on every device and doesn't reduce every measurement.
For large audio clips, check the compression format, quality, and sample rate for your build target. Consider Force To Mono for effects that don't need stereo. After rebuilding, check speech clarity, looping, and playback latency.
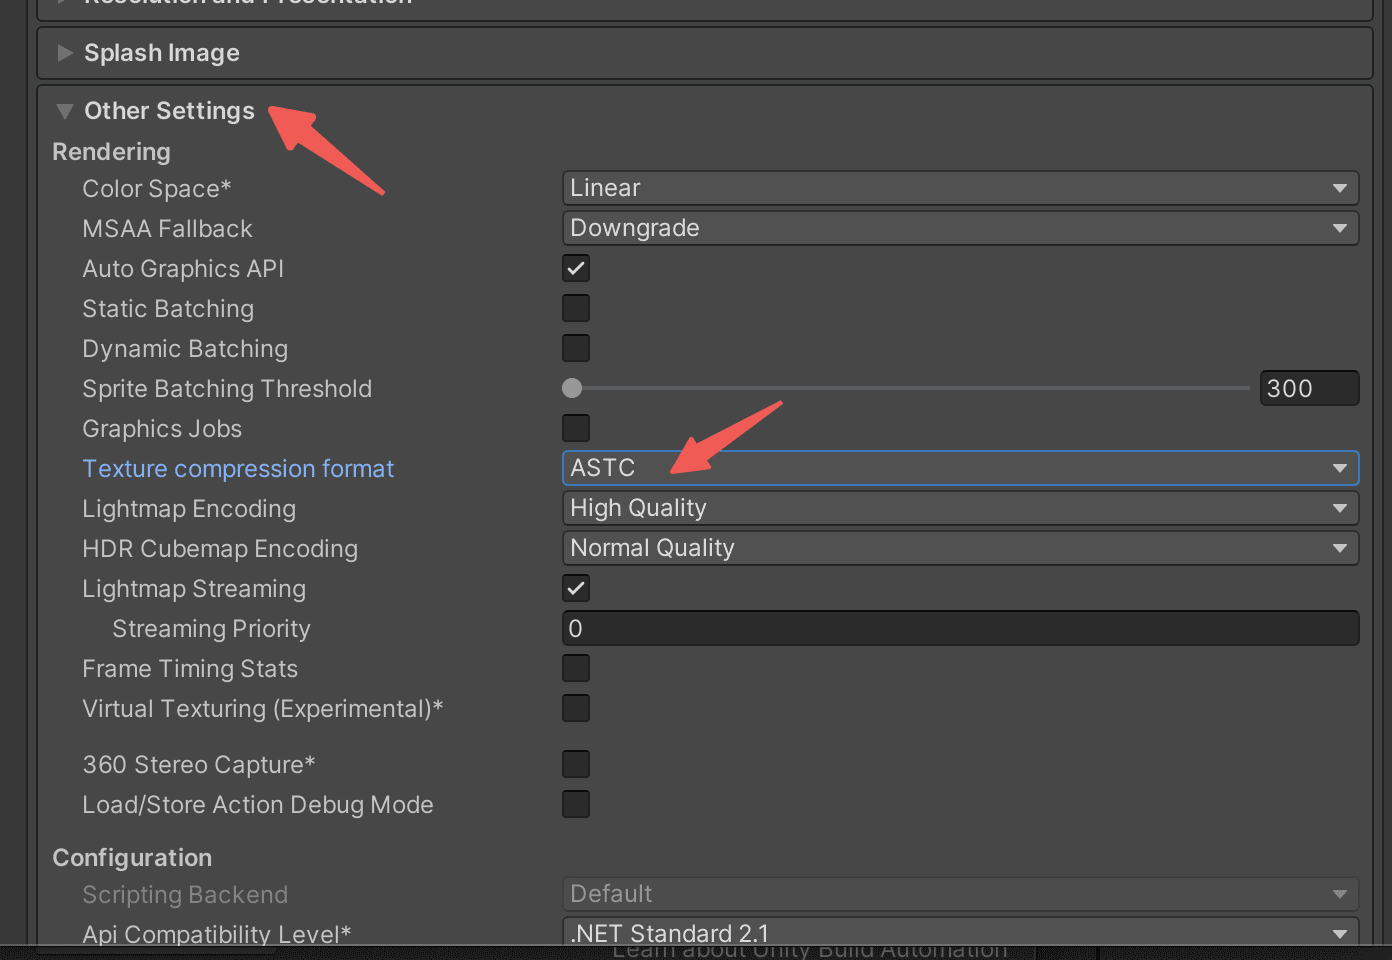
Load Type affects loading and memory behavior, not compressed file size.
Strip unused code
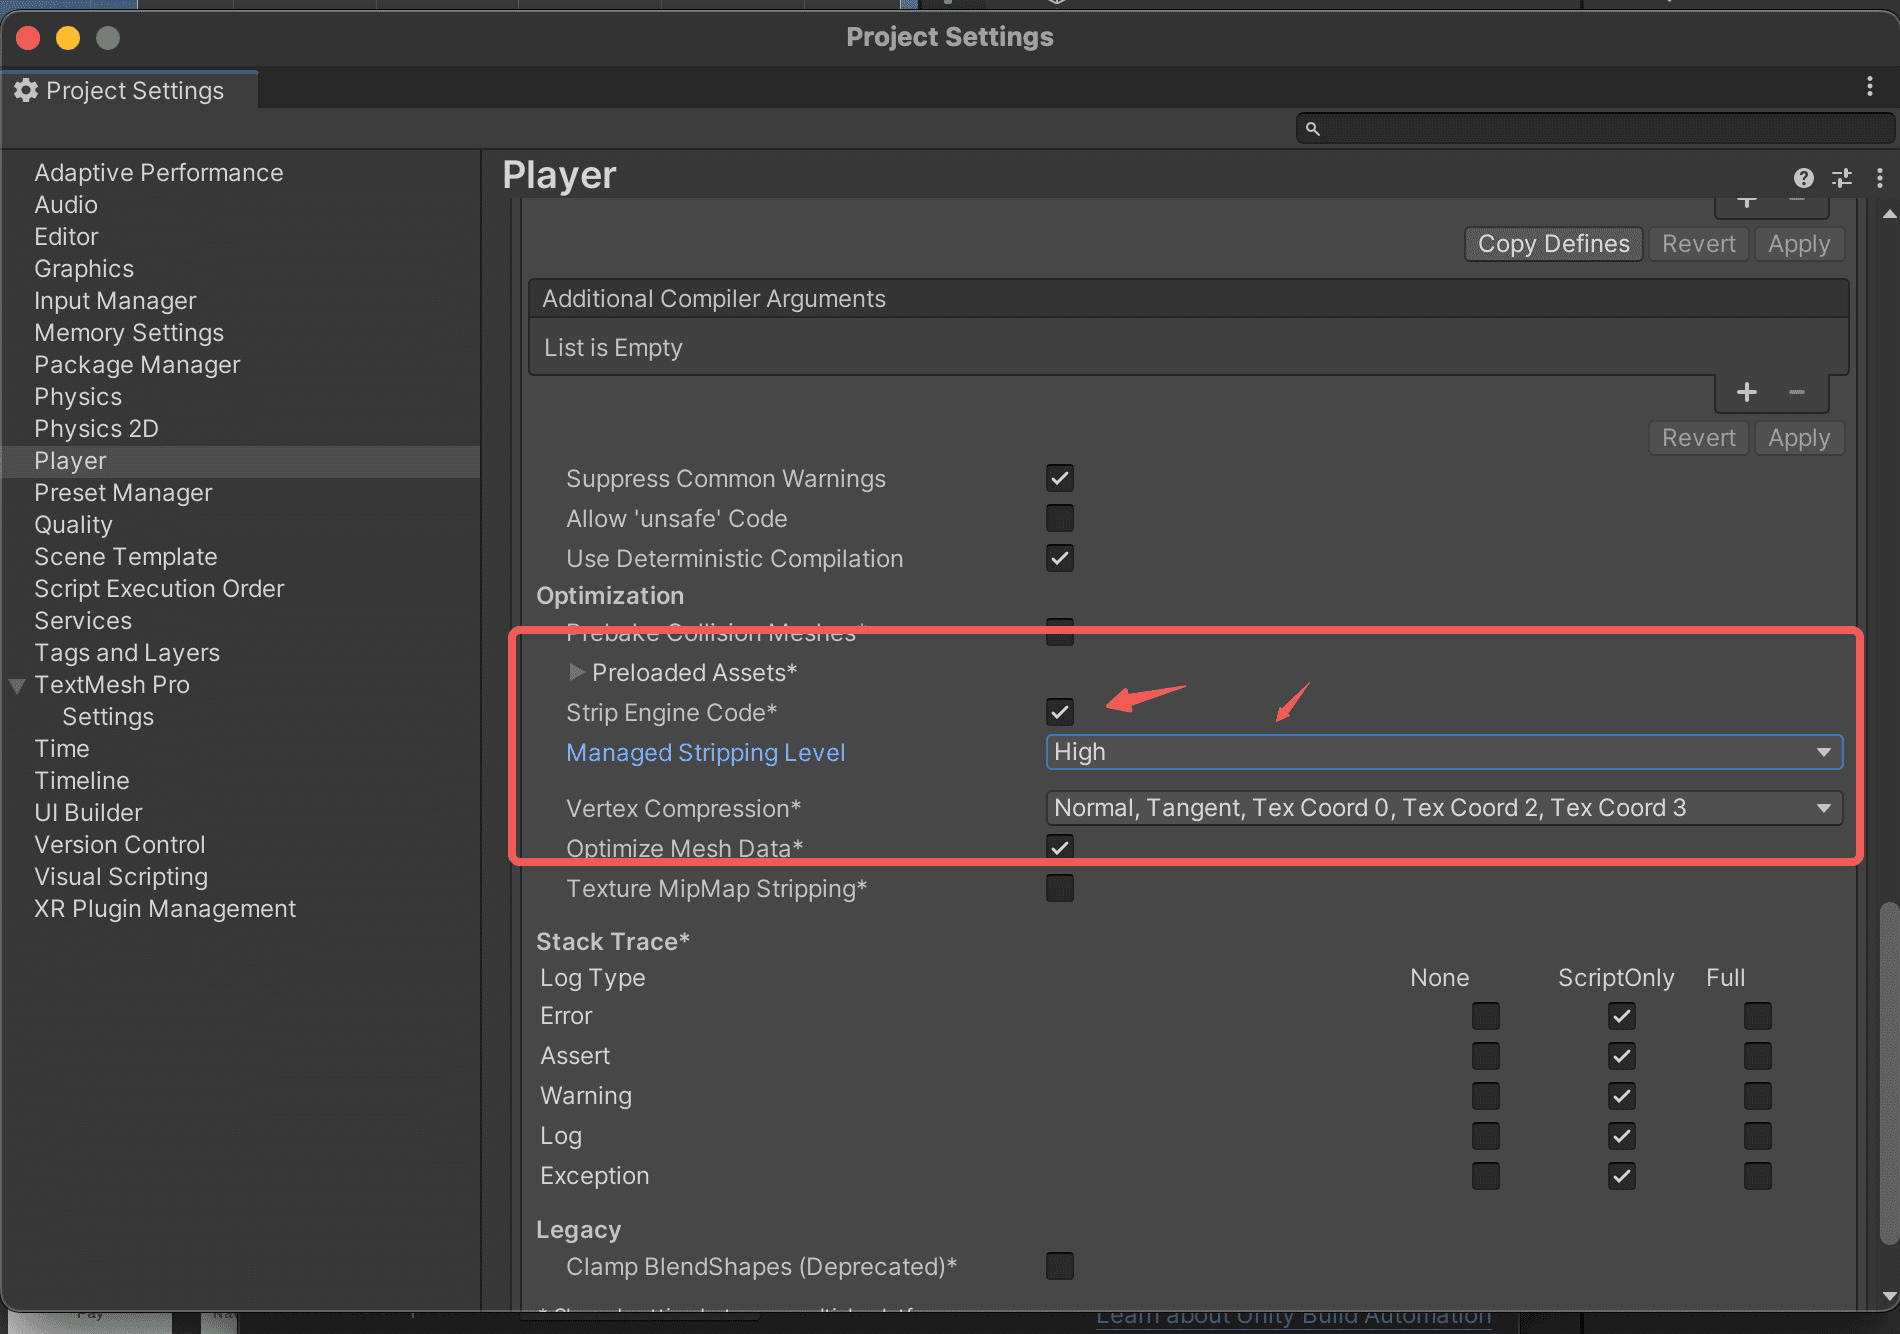
In Edit > Project Settings > Player > Other Settings, review Managed Stripping Level and Strip Engine Code.
Increase stripping one level at a time. After each change, rebuild and test reflection, JSON serialization, SDK callbacks, and dynamically created types. High isn't the right level for every project.
If required code is stripped, add an Assets/link.xml file that preserves the assembly, type, or member your game needs. If you use Wasm code splitting, also preserve the serialized data types your game uses for saves, so IL2CPP managed code stripping doesn't remove them.
<linker>
  <assembly fullname="GAME_ASSEMBLY">
    <type fullname="SAVE_DATA_TYPE" preserve="all"/>
  </assembly>
</linker>
Replace the following:
GAME_ASSEMBLY: the name of the assembly that contains the type.SAVE_DATA_TYPE: the fully qualified name of the type to preserve.
In Window > Package Manager, review your packages and built-in modules. Remove a package or module only after you confirm that no scene, script, or dynamically loaded asset depends on it. After rebuilding, test the affected gameplay.
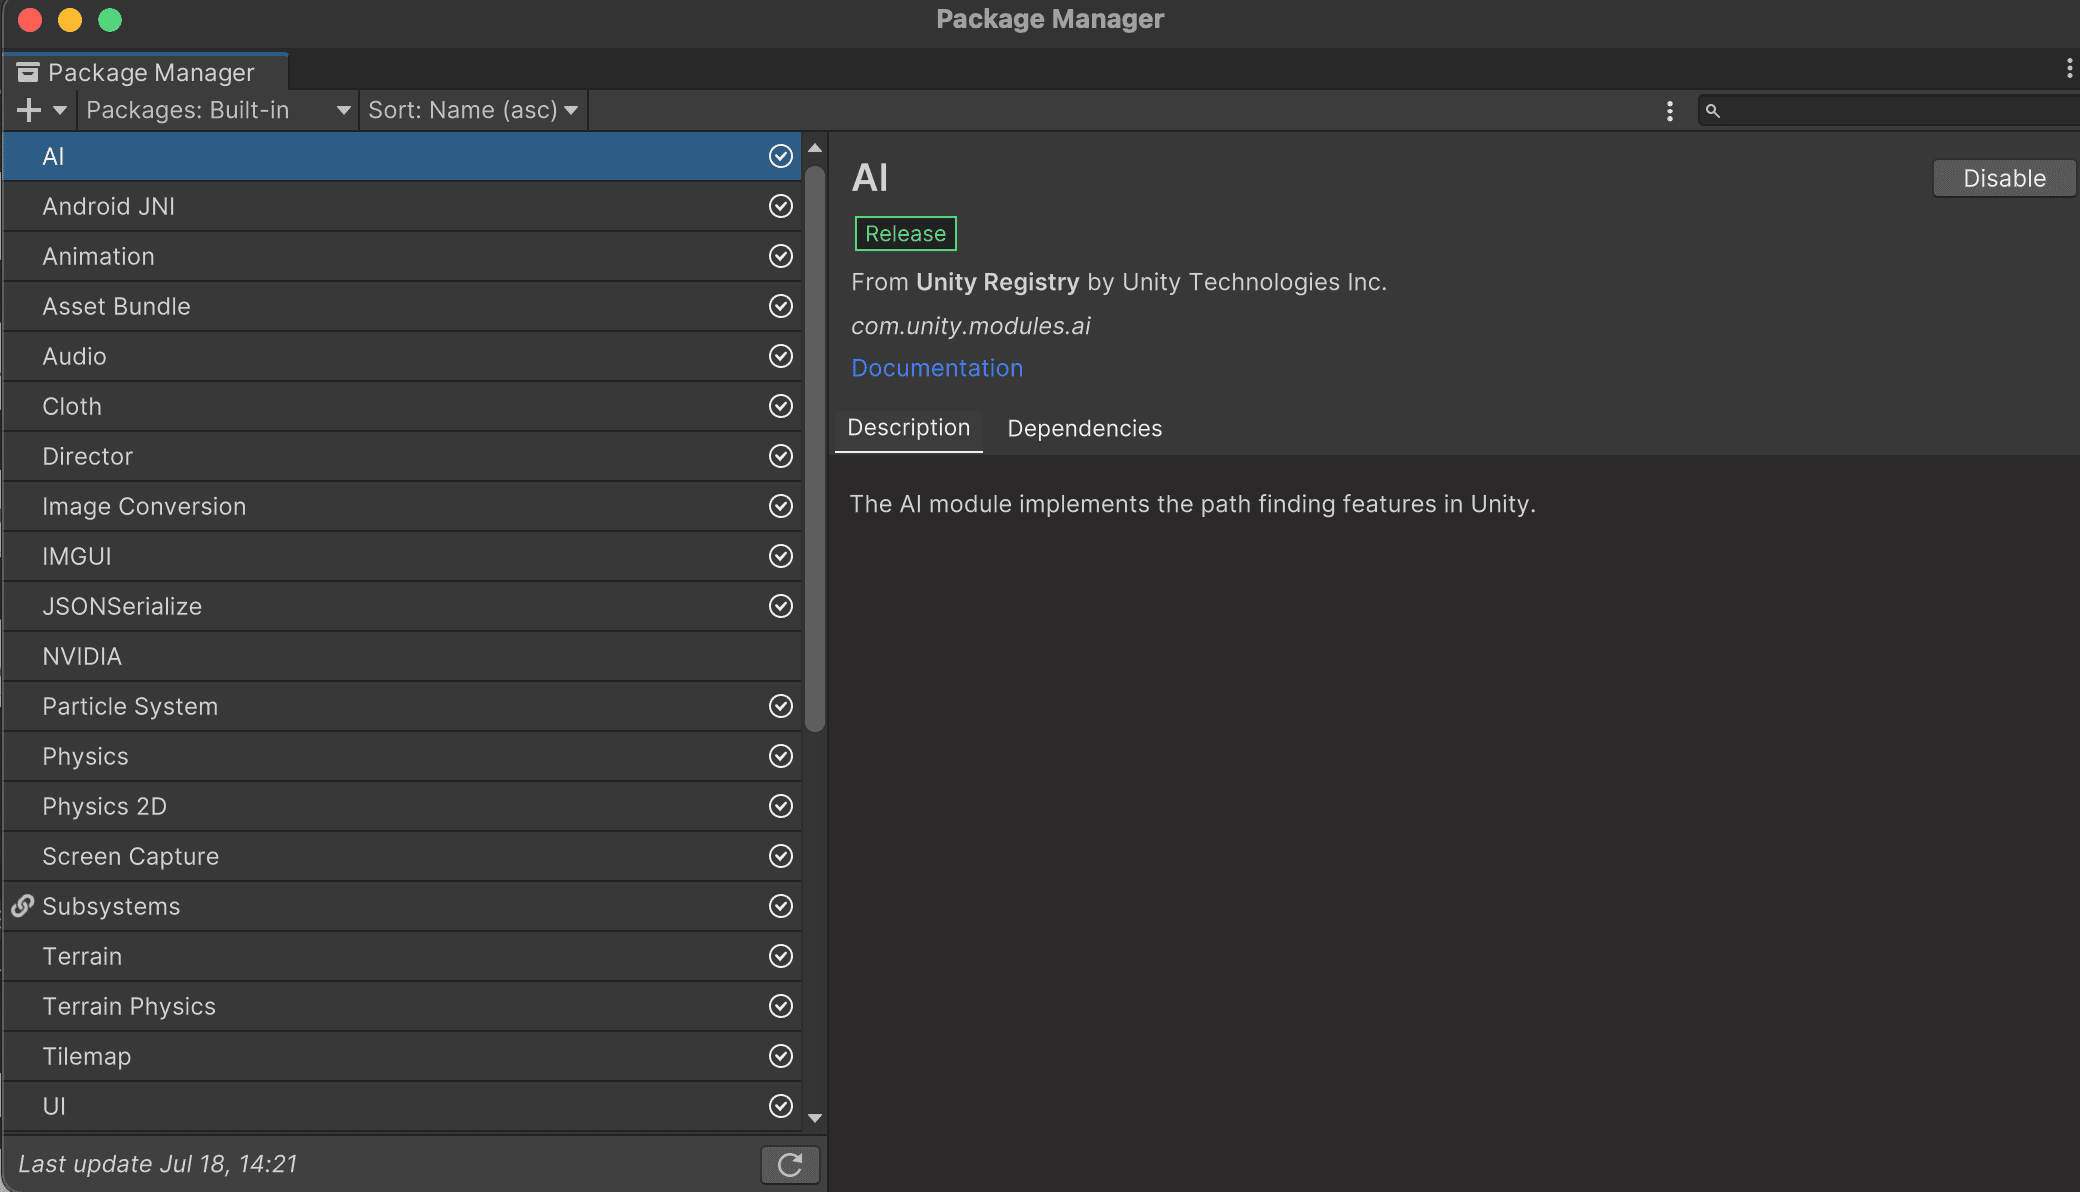
Review graphics and debug settings
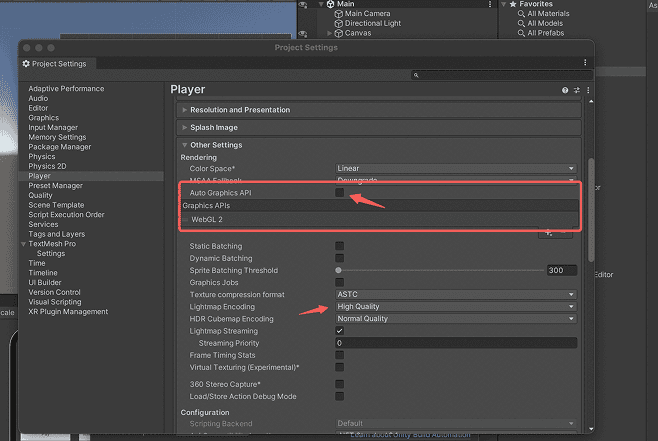
Graphics API: Review the graphics API settings against your Unity version, rendering features, and target devices. Turning off Auto Graphics API changes the supported graphics backends. Change it only after you check compatibility, then compare build output, rendering, and startup on devices. There's no single required choice between WebGL 1 and WebGL 2.
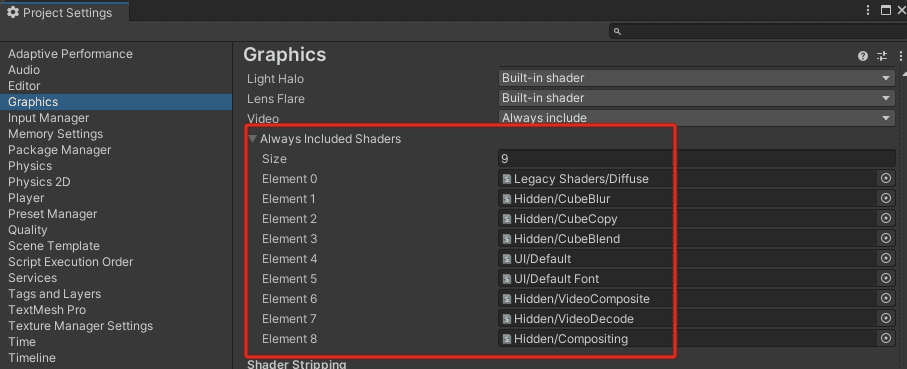
Shaders: In Project Settings > Graphics, review Always Included Shaders. Remove a shader only after you confirm that no scene, material, or runtime-loaded content uses it. Check dynamically loaded scenes for missing effects or pink materials.
Debug symbols and exceptions: In Publishing Settings, review Debug Symbols and the exception settings for your debug and release builds. Compare build size and diagnostic behavior, and test failure paths before you change them.
- If your Unity version offers External debug symbols, consider keeping them in a separate file for the matching build. Check the export output and keep the symbols you need to investigate that release.
- Explicitly Thrown Exceptions Only covers only exceptions your game throws explicitly, so it provides less coverage than Full. Check how your project handles errors and test those paths on a phone before you choose.
Load later-level assets on demand
Remove unused test scenes from Scenes In Build. Check Resources, the startup scene, and prefabs for direct references to later-level assets. Don't delete assets the game still needs.
- AssetBundles: If your existing AssetBundle loader meets your needs, keep using it.
- Addressables: Put later-level assets and scenes in an appropriate group, remove unnecessary direct references from the startup scene, and test loading and unloading. For group and deployment settings, see Unity's Addressables remote content overview.
- Remote content: Deploy matching bundles over HTTPS, and the catalog and hash if enabled. Register the request domains in your app's development configuration.
Build the resource content and the game package for the same target and release. Assets that are still included in the package count toward its size, even if the game loads them later.
On a phone, test first entry, entering and leaving levels, re-entry, and retrying after a network failure. A test in the Editor doesn't confirm that remote loading works on a phone.
Addressables loads assets. Wasm code splitting is a separate process. See Split Wasm code.
Compare results
Rebuild with your baseline settings. Compare the final package and its largest files. Separately measure download, initialization, and first-scene wait times on the same phone and network. Check visuals, audio, saved data, core gameplay, and later levels.
If you find a regression, revert the last change and isolate its cause.
- A scene is still large: Check whether it's still included in Scenes In Build, in
Resources, or as a startup dependency. - Stronger stripping causes errors: Return to the last working stripping level and preserve the missing code in
link.xml. - A phone can't load remote content: Check the actual HTTPS URL, trusted domains, deployed files, and build target.
Split Wasm code
Wasm code splitting divides Unity-compiled code into a main Wasm file and code packages that load on demand. This reduces the amount of code that loads and initializes at startup. Images, audio, and other assets need their own loading strategy. For the full procedure, see the Unity Wasm code split guide.
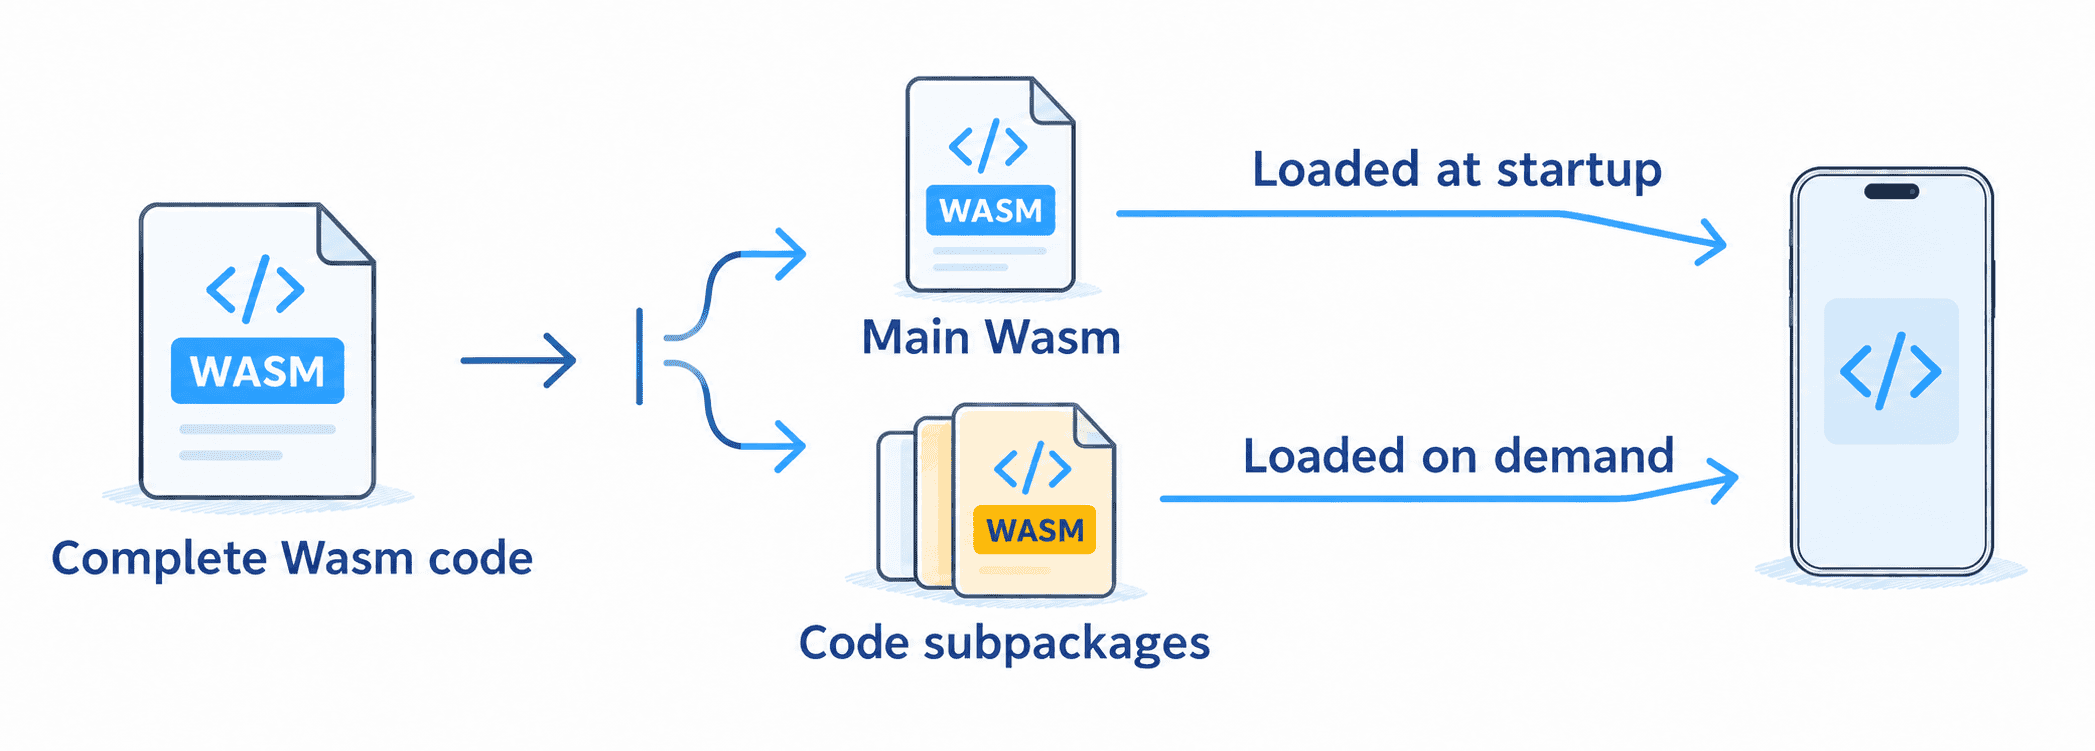
Consider splitting if Wasm loading or initialization slows startup, or if DevTool prompts you to split code.
Note: Function collection requires a TikTok test account from outside the US and EU. Some builds with bulk memory enabled don't support code splitting. If your build uses bulk memory, contact TikTok developer support to confirm compatibility.
- Prepare a complete build that has passed Client preview, and back up its unsplit output directory.
- Check the exported package's
game.jsonfile and any DevTool prompts. When code splitting is enabled (enableWasmSplit: true), keep bulk memory turned off (enableBulkMemory: false). - Following the code split guide, collect functions. Cover startup, onboarding, and the first few levels.
- Split the code and test on a phone. Repeat the same path and check whether large amounts of split code still load before the first playable interaction.
Don't change wasmFuncCount manually to dismiss a prompt.
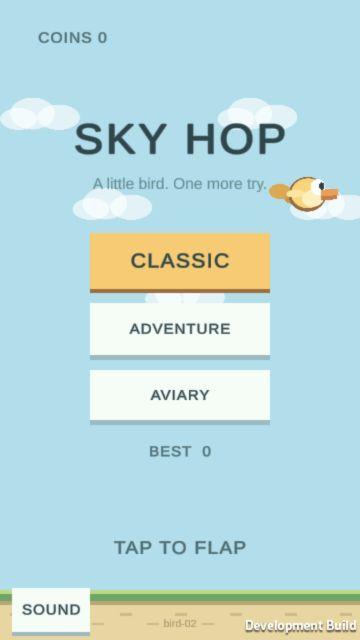
Try the Sky Hop sample: Use the Sky Hop sample to try Wasm code splitting. The sample doesn't include the SDK plugin. Extract the ZIP file, open the project directory in Unity Hub, and import the plugin. Then prepare the sample with these menu commands:
- Sky Hop > Open Scene: opens the sample scene.
- Sky Hop > Prepare TikTok (Regular): prepares the scene and build settings.
Build and preview the sample as described in Switch to WebGL and Preview on your phone. During function collection, cover Classic and Adventure modes, coins, shields, magnets, pausing, and restarting. After splitting, retest these paths and saved data.
Download: sky-hop-sample-en.zip
Next steps
- Prepare a release build and submit it, as described in Release your game. If you split Wasm code, repeat the split for the release build.
- Check method signatures in the TikTok SDK for Unity reference. After you upgrade the plugin, rebuild and test core gameplay and integrated platform features.
- Prepare for review with the Acceptance Testing Guidelines.